
Plastic shed after hardest part done
Instead of travel for a couple of months, I had home improvement projects at a friends plus a few side adventures in the area. If you want more of my travels, you’ll have to wait for the next post, or skip down to the end of this post for the little bits of other stuff I did besides building. My largest project was to build two sheds: one out of old school wood, and one from a kit primarily out of plastic. I’m not going to say one is better than the other – there are many factors in picking a shed. Read on to see the showdown!

Plastic shed to be
My expectations were that I would be building for about a month, based on having some help to get started and then having to finish both with only occasional help. Having the sheds alone take closer to two months was not too surprising with my nine to beer-o’clock working schedule, but overall things took a little longer than I expected. I’d say the biggest slow down was my lack of straight lumber. I’m not a master builder that knows how to compensate for twisted bowed wood, other than cursing at it profusely.
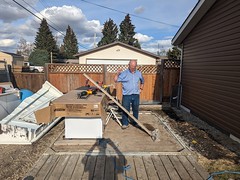
The help on demo and base building
I had help to start for the first week. The wood shed was wood in part because we needed a custom size to go up against the edge of a garage, replacing an old standard shed on its last legs. The new shed was going to be longer and narrower to give my parking pad a bit more room. When you build your own from scratch out of wood, you can make it whatever size you want and not be constrained by kit sizes. The old shed had a couple of freezers in it that were temporarily parked outside under tarps. The plan was to move them into the partially built new shed then build the rest of the shed around it. Yes, there is a side door in the new shed you can get a freezer in/out of, but it is much easier to just plop a freezer on a base and build a shed around it the first time!
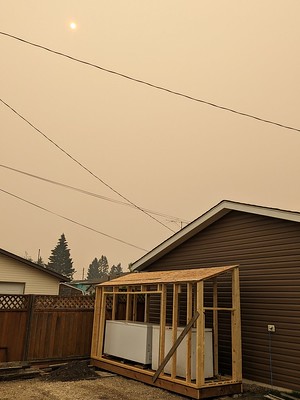
Shed framed. No work happened on this extremely smoky day, that dim light is the sun.
My help lasted long enough to get me a start on the framing, along with a basic plan to follow for the rest of the shed. I’d have to figure out the rest of the details myself. Unfortunately, I’ve never built a shed from scratch before, so I’m not sure if some of those details are the “right” way to build things. I say right in quotes there as I’ve seen contractors argue about little details that really don’t matter much. All I do know is that the shed is overbuilt enough that anything sub-optimal is still going to be standing in ten years and however number of extreme weather events from now. Speaking of extreme weather, this was during the dry spring of 2023 in Alberta/NWT, which I hope is forever known as the worst fire season ever. I have never seen that kind of level of fires, although at least in the south we were spared from a lot of the days of smoke. Ironically, the smoky days were the coolers ones with the sun’s heat being blocked out by the smoke. You can make your own conclusions regarding global warming.
Fitting the front doors
My biggest challenge having not built a shed before was dealing with bent wood. I know a little from helping my Dad way back when, but not enough to compensate when building a shed. The frame for the top of the main doors ended up with a U bend down – I had a lot of fun trying to make the doors fit in that properly. At the end of the day, I had doors that closed, just not well. They jam a bit and the latches need a little convincing to go in as they don’t quite line up right.
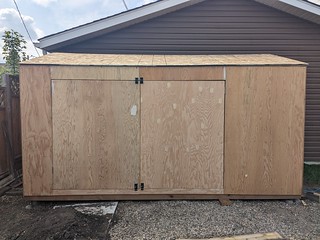
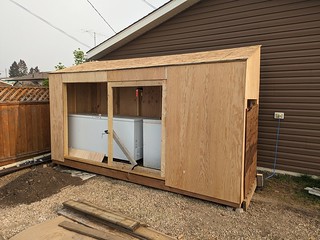
Finished minus a bit of door hardware
It’s a shed so you can live with it. One thing about building a wood shed is that with a few clamps, temporary nails and a little ingenuity, you can build the whole thing yourself, which I did other than a little help fitting the doors. You’ll see the plastic kit shed is actually more challenging to do by yourself!
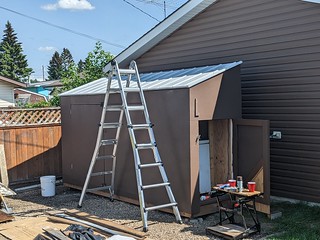
Painted with clad roof, showing side door for freezer removal and pocket storage
The finished shed got a metal clad roof donated from the old main shed. It turned out that half a roof was the exact width needed, within a half an inch. Even the panels worked out lengthwise. I did not have to cut the last one to size, it just fit with enough overlap like it was designed for it! Having painted the metal white, the roof looks good and will ensure the shed lasts a long time with the occasional wall painting. Overall, considering this was my first shed, I’m happy with the result. Having help for the base and the first couple of wall frames at least set me up in the right direction – I didn’t screw up too badly and there is now a shed with three doors that mostly open and close. I’m sure if I do another wood shed, it will come out even better.
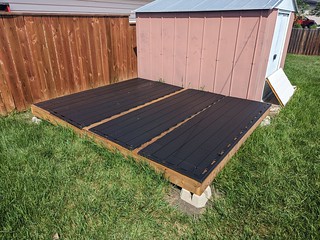
Wood base with plastic floor laid out
Having built the wood shed, I was hoping the plastic kit shed would be easy. I was dubious about how solid this thing would be. The plastic”Lifetime” brand shed, does have a minimal amount of metal framing, mostly the roof trusses and some vertical reinforcement for the walls that fall short of posts as they don’t hold load; they just keep the plastic walls stiff, which do hold the load. You will need to build your own base unless you happen to have a perfectly flat bit of concrete or wood deck to start with. I had help with this part so I ended up with a very straight and level base to start with. Anything off on the base will translate into problems on the shed – you want to get the base as good as you can.
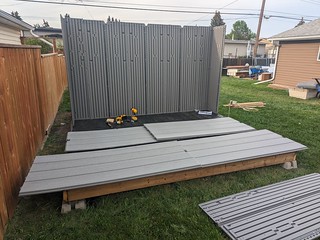 The walls snap into the base a lot like a giant plastic model. It wasn’t hard to get them in, but more difficult to get them to align correctly. The corners lock in, but it is difficult to see if you have the panels aligned. I got to the second corner and promptly had to disassemble my walls to adjust them to make the corner fit properly. At least, I thought I had it all fit in the second time. I suspect I still was off a bit which translated into a bit of a warped shed that I had to deal with later.
 Once the walls were up, the hard part came. The instructions say you need three people to assemble this shed. I had me, plus the occasional available one person help. Of course, said person was not available for putting the gable up, which is where the instructions say you need three people. While their method does have three people, you can do this with two people with some bracing and a bit more skill. I needed a lot of bracing, skill, and a bit of ingenuity thrown in to get the the gable up myself.

Whole lotta bracing going on
The problem was that you needed to put the doors on first, with the tops of the hinges just flapping in the air, not held by anything until the gable gets dropped down on them. Thus the three people: One on each side of the door to hold them in, and one on a ladder dropping the gable down, which the door people can help guide too. I replaced the two door people with bracing, but getting the gable in place by myself was most challenging. It’s not super heavy, but a bit of wind that day blew the thing over on me once. Good thing it’s plastic, it just shrugged that off without a scratch having fallen into the shed on its shiny new plastic floor.
My second attempt was successful, after much cursing and realigning I had the doors hinged to the bottom plastic floor and the top gable. Really, a few more metal framing bits here could make this job a lot easier. But I was done the hardest part of the assembly all on my own. The gable for the rear of the shed just drops in place easily in comparison. It would be nice to have a second person for that, but you can do it on your own if you have to.
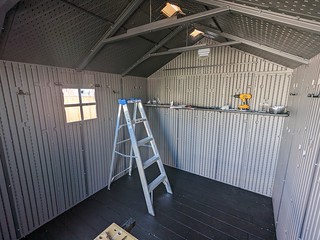 I neglected to get a picture with the trusses up before I put the roof on, so this interior pic will have to do. You can see the shelf they give you in the back. It’s not just for putting stuff on, it’s part of the structural stiffening too! The trusses went on without much issue. Again, having a second person is nice, but you can do it on your own. The plastic roof panels are easy to put on, but this is the point you’ll find out how straight your shed is so far. Mine wasn’t and I had to do a bunch of loosening panels and wiggling them around to get things to fit properly, which led to a noticeable lean to the right when facing the door.

Straps and lumber added after to make the shed lean to the left
According to the instructions, you put shims under the plastic floor at the walls to straighten things out. This partially fixed my problems. My shed was not straight enough to keep the doors from binding, so I had to use straps and lumber leaning to the left to get the shed to bend to my will. A hot day helped in that regard. I’m no plastic shed expert; perhaps I needed to raise my floor with shims more but I’d already raised things quite a bit. At any rate, my solution worked and the doors open reasonably well, not quite perfect. The bendy plastic also isn’t great for the supplied metal screws. It is hard to gauge how much torque to put on them – I stripped a couple with way less torque than I thought I needed to keep things together. This is where having a bit more metal to screw together for the frame would be so much better. Screws with nut and bolt holding together two plastic bits seems a lot better to me than a large thread screw biting into a plastic hole holding things together.
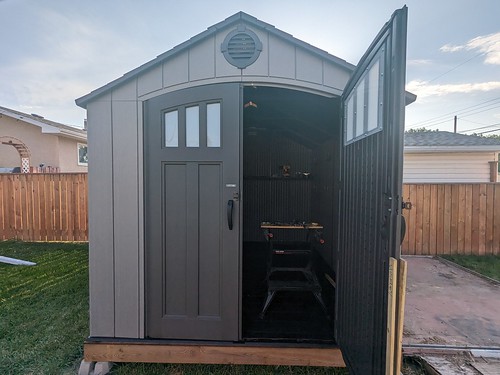
Finished shed open for business
Looking at the finished product, it looks pretty good. I think the roof as supplied will hold all but the most crazy snow loads. The internets says you should add reinforcement, I say only if you get more than a couple of feet of snow on the roof. As far as the shed staying straight with the doors staying aligned, time will tell. I wouldn’t lean a lot of heavy stuff against the walls, that’s for sure. I would say you need a fair bit of handy skills to build this thing. If you find Ikea furniture a challenge, you might just want to get someone to build this thing for you, especially if you don’t know how to build a level base. Would I buy one? Perhaps, probably not quite this big though, I think this is 10×10′, I’m not sure of the exact size anymore. The plastic is prettier, but not as solid. So as to which is better, it depends on what you want!
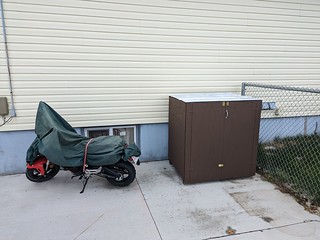
Built box with Grom for scale
You’ll note in the last picture the base is pretty high up off the ground. I built a ramp with wheels that just slides under the base so you can roll stuff up and into the shed. Totally should have built the shed base a bit lower to the ground, in hindsight. Also in hindsight, I should have pushed for a longer wood shed, as there was not enough extra storage in that one to replace the space in the old back shed. So I built a box on wheels to replace some of that storage. It got most of the remaining metal roof from the old main shed with the same paint, so things look color matched around the place now.
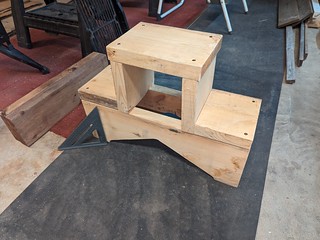
Custom step. You can step up on either side to the top, only 7″ wide to fit in the front of the freezers.
I also built a small narrow step of my own design to sit in front of the wood shed. My friend is a little short to reach all the way to the bottom of the freezers, so the step allows them some extra height to reach over and down into the freezers. It’s what I could come up with based on the scrap lumber I had, but I’d build it like this again given any lumber, I’m pretty happy with it. You step on it from the sides, the picture shows it exactly as it would sit in front of you in the shed with the freezers in front of the step.
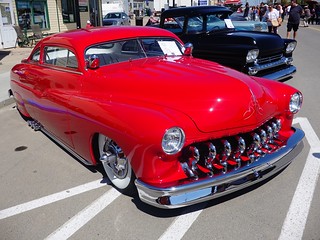 It wasn’t all work while I was in Didsbury. I spent a few hours at the Didsbury Car show, a much bigger than expected car showing that takes up the main street and spilling over to the side roads of Didsbury. You can head over to my Flickr Car Show Album if you want to see more of those shots. It’s worth a drive to Didsbury for sure. There are street vendors and some craft sales going on too, for people not so into cars.
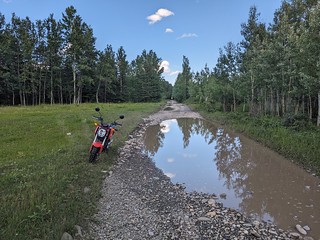
The road was good gravel underneath the puddles. This is a potential spot, if you can get permission.
I did finally get out with the Grom Motorcycle to do one exploratory boondocking search. I found lots of boondocking in theory. It’s theoretical in that it is grazing lease crown land. The lessee can be contacted ask for permission to hike/hunt//camp. You can generally get permission to walk and perhaps hunt in season, camping can be refused and is often marked as such. As there is some good boondocking to the north of where I explored (as I found out later) it’s not worth it to try and stealth camp or contact for permission. Just head north and a little further into the treed country to find boondocking without the hassle.
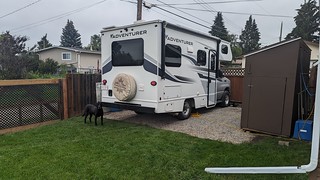
Gate, upgraded pad, wood shed.
I had almost totally forgotten about the gate improvements. I added a second swing gate, and took the boards off both gates replacing them with lattice to lighten them up. They hopefully won’t sag. The pad got some fresh gravel too. Gate, pad and wood shed were all work to allow my rig to fit better in the back yard, which it certainly does now. Why was it parked? I was off to another adventure, this time fishing in Skitchine for some Kamlooper rainbows! See you next time for that, and the my summer adventures around Alberta! Or perhaps I’ll skip ahead to my current adventures in Baja since I’m so far behind. You’ll have to read on to see what is next!

Pingback: What I did last summer | Ratsofrass